Creating a RaspberryPi 3b+ Home Assistant Screen
Items used:
1. Raspberry Pi 3b+
2. 32 Gig Micro SD
3. Raspberry Pi 7" Touch Screen Display - https://www.amazon.com/gp/product/B0153R2A9I
4. SmartiPi Touch 1 - Case - https://www.amazon.com/gp/product/B01HV97F64
5. FullPageOS
6. Notepad++(DO NOT USE REGULAR NOTEPAD)
Download the latest build from here: http://unofficialpi.org/Distros/FullPageOS/
Use the Pi SD Card Imager of your choice to flash the image to the sd card.
After it images, before you boot edit the following:
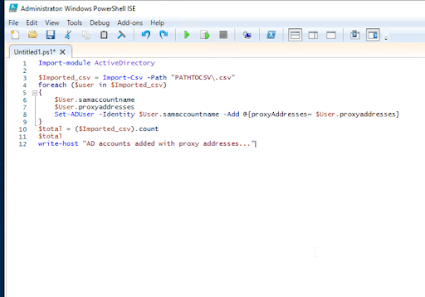
In the config.txt file do the following:
Under RPI4:
comment out "dtoverlay=vc4-fkms-v3d" under rpi4
Under All:
comment out the very last line and uncomment "dtoverlay=vc4-fkms-v3d"
Save and close that config file.
To configure wifi if you are going that route:
Open /boot/fullpageos-wpa-supplicant. txt in a text editor.
Locate the WPA/WPA2 secured section in the text file.
Uncomment network={ to } (4 lines) by removing the # signs from the beginning of each line.
Replace put SSID here with your Wi-Fi network id.
Replace NONE with the Wi-Fi password.
Save and close that file.
To configure the web page that loads:
Open fullpageos.txt and change the URL to what you want it to be. In my case I put in http://homeassistant.local:8123 to access my Hassio instance.
Save and close that file.
Power up your Pi and bam! A portable control kiosk that is touch enabled!


Comments
Post a Comment